DIY Centerpiece Ideas for Birthday Party: Forget florist’s fees and embrace the joyous chaos of crafting! This guide dives headfirst into a whirlwind of budget-friendly brilliance, themed triumphs, and naturally inspired elegance. We’ll transform everyday materials into stunning centerpieces that will leave your guests gasping (in a good way, of course), proving that party perfection doesn’t require a small fortune or a degree in floral artistry.
Get ready to unleash your inner creative genius and craft centerpieces that are as unique and memorable as the birthday star!
From superhero soirees to princess palaces, and everything in between, we’ll explore a plethora of DIY centerpiece ideas, complete with step-by-step instructions, cost breakdowns, and even a few tips and tricks to avoid crafting catastrophes (because let’s be honest, sometimes glue goes where it shouldn’t). Whether you’re a seasoned crafter or a complete novice, this guide is your passport to party-decorating paradise.
Budget-Friendly DIY Centerpiece Ideas
Throwing a party shouldn’t break the bank! These five centerpiece ideas prove that stunning decorations can be surprisingly affordable. Get ready to unleash your inner crafting genius without emptying your wallet.
Mason Jar Magic
Transform humble mason jars into charming centerpieces. This requires minimal effort and even less expense.
- Materials: Mason jars (various sizes), colorful ribbons, wildflowers or artificial flowers, pebbles or sand.
- Process: Clean the jars. Fill the bottom with pebbles or sand for stability. Add your chosen flowers. Tie a ribbon around the neck of the jar for a touch of elegance.
Painted Bottles of Joy
Give those old glass bottles a new lease on life! A splash of paint and a few crafty additions are all it takes.
Discover how easy halloween crafts for adults has transformed methods in this topic.
- Materials: Recycled glass bottles, acrylic paints, paintbrushes, twine, small artificial flowers.
- Process: Clean and dry the bottles. Paint them in your desired colors and let them dry completely. Once dry, wrap twine around the neck and add a few small flowers.
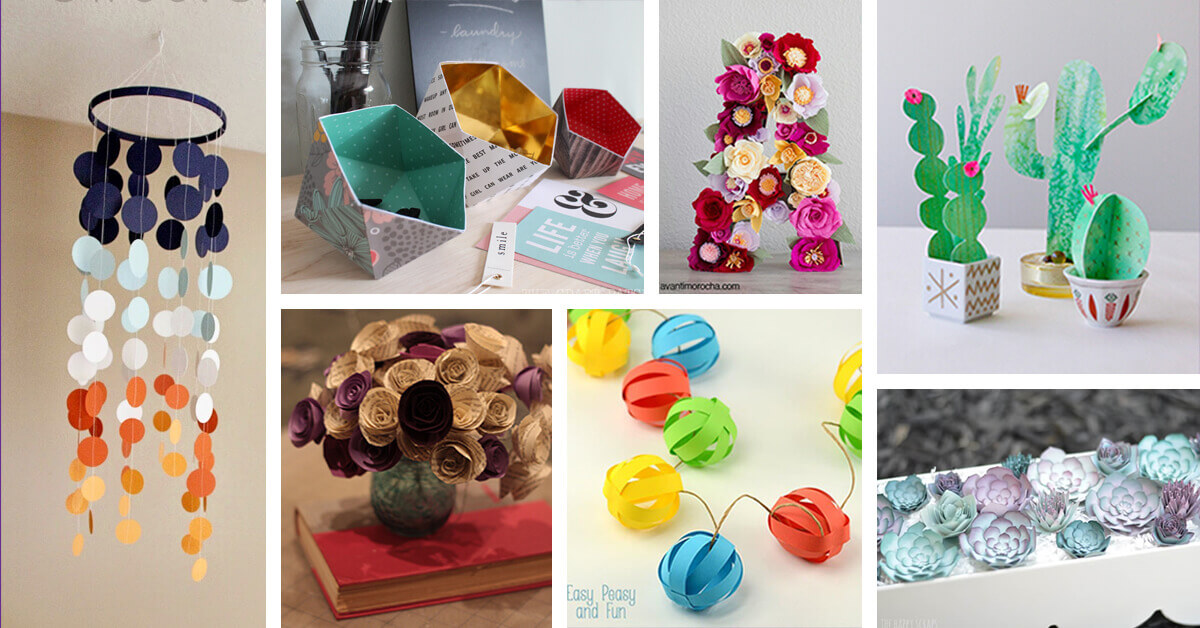
Paper Flower Power
Create a vibrant centerpiece using nothing but paper! This is a fantastic option for a themed party.
- Materials: Colorful construction paper, scissors, glue, wire or sticks.
- Process: Cut out various flower shapes from the paper. Assemble the flowers by layering the petals and gluing them to the wire or sticks. Arrange them in a vase or container.
Candlelit Charm
Simple tea light candles can create a warm and inviting atmosphere. A few additions elevate them from basic to beautiful.
- Materials: Tea light candles, small glass containers (e.g., votives), decorative sand or beads.
- Process: Fill the containers with sand or beads. Place the tea lights on top. Consider adding small shells or other decorative elements.
Fruity Fiesta
Embrace the edible! A centerpiece made of fruit is both visually appealing and delicious.
- Materials: Various colorful fruits (e.g., strawberries, blueberries, grapes), skewers, a shallow bowl or platter.
- Process: Arrange the fruits attractively in the bowl or platter. You can thread some fruits onto skewers for added height and visual interest.
Centerpiece Comparison Table
| Centerpiece Name | Materials Cost | Time to Make | Difficulty Level |
|---|---|---|---|
| Mason Jar Magic | <$5 | 15-20 minutes | Easy |
| Painted Bottles of Joy | <$7 | 30-45 minutes | Easy-Medium |
| Paper Flower Power | <$3 | 30-45 minutes | Medium |
| Candlelit Charm | <$5 | 10-15 minutes | Easy |
| Fruity Fiesta | <$10 | 15-20 minutes | Easy |
Themed DIY Centerpieces

The right centerpiece can truly set the tone for your party. Let’s explore some themed options that are both fun and easy to create.
Superhero Centerpieces
Embrace the power of imagination with these superhero-themed centerpieces, perfect for celebrating any young hero’s birthday.
- Cityscape Centerpiece: Use a cardboard box to create a miniature cityscape. Add toy buildings, miniature cars, and superhero figurines. Include small flags representing different superhero logos.
- Power Symbol Centerpiece: Create centerpieces featuring the iconic symbols of your child’s favorite superheroes. Use construction paper, foam board, or even paint to create the symbols. Place them in clear vases or jars.
- Mask Mania Centerpiece: Use inexpensive superhero masks (easily found online or in party supply stores) as the centerpiece. Arrange them on a tiered stand or simply group them together in a basket.
Princess Centerpieces
Transform your party space into a royal kingdom with these enchanting princess-themed centerpieces. Think elegance, sparkle, and a touch of magic.
- Castle Centerpiece: Use a cardboard box or foam board to construct a miniature castle. Decorate it with glitter, paint, and princess-themed stickers. Add small plastic figurines of princesses and their animal companions.
- Floral Crown Centerpiece: Create a beautiful centerpiece with artificial flowers arranged in the shape of a crown. Use pink, purple, and white flowers for a classic princess look. Place it on a decorative mirror or tray.
- Tiara Treasure Centerpiece: Use inexpensive tiaras (available at party supply stores) as the focal point. Surround them with pink and purple ribbons, glitter, and small decorative gems.
Comparing Superhero and Princess Themes
While both themes aim for visual impact, their approaches differ significantly.
- Color Palette: Superhero themes often utilize bold, primary colors, while princess themes tend towards softer pastels like pink, purple, and light blue.
- Materials: Superhero centerpieces might incorporate more recycled or repurposed materials (like cardboard boxes), while princess centerpieces might lean towards more delicate materials like ribbons, glitter, and artificial flowers.
- Style: Superhero centerpieces are often more dynamic and action-oriented, while princess centerpieces are typically more elegant and refined.
DIY Centerpieces Using Natural Elements: Diy Centerpiece Ideas For Birthday Party
Bring the beauty of nature indoors with these elegant and eco-friendly centerpiece ideas. They’re surprisingly simple to create and add a touch of rustic charm.
Floral and Foliage Fantasies
Flowers, leaves, and branches offer endless possibilities for creating unique and beautiful centerpieces. The key is to consider color, texture, and form.
- Flower Power: A simple vase filled with wildflowers from your garden or a local florist can make a stunning centerpiece. Consider adding some greenery for contrast.
- Leaf Arrangements: Collect interesting leaves of various shapes and sizes. Arrange them in a shallow bowl or platter, perhaps with some berries or small pinecones.
- Branching Out: Use interesting branches (perhaps from a pruned tree or bush) as a base for your centerpiece. You can add flowers, leaves, or even small fairy lights.
Nature’s Bounty Centerpiece
This centerpiece showcases the beauty of readily available natural materials.
- Materials: Pinecones, acorns, twigs, leaves, a shallow bowl or basket.
- Process: Arrange the collected natural items in the bowl or basket, creating a visually appealing composition. Consider varying heights and textures for added interest.
Recycled Rustic Elegance
This centerpiece demonstrates a commitment to sustainability.
- Materials: Recycled glass jars or bottles, twine, dried flowers or leaves, small candles.
- Process: Clean the jars or bottles thoroughly. Wrap twine around the necks. Arrange the dried flowers or leaves inside. Add a small candle for a warm glow.
Natural Element Showcase

These elements offer diverse aesthetic qualities, but require careful handling and consideration.
- Flowers: Vibrant colors and delicate textures; requires careful handling and may wilt quickly.
- Leaves: Varying shapes, colors, and textures; can be brittle and prone to damage.
- Branches: Interesting shapes and forms; may require cleaning and preparation.
- Pinecones: Rustic and textural; can be easily incorporated into various designs.
- Berries: Adds pops of color and texture; some berries may be poisonous, so careful selection is crucial.
DIY Centerpieces with Candles
Candles add a touch of warmth and ambiance to any celebration. However, safety should always be the top priority when incorporating candles into your DIY centerpieces.
Safe Candle Integration
Always use a heat-resistant base for your candles. Never leave burning candles unattended. Keep candles away from flammable materials. Choose flameless candles as a safer alternative.
Candle Arrangement Techniques, Diy centerpiece ideas for birthday party
Varying candle heights creates visual interest and depth.
- Tiered Arrangement: Use candle holders of different heights to create a tiered effect. This creates a visually stunning centerpiece.
- Clustered Arrangement: Group candles of similar heights together for a cohesive look. Consider adding decorative elements between the candles.
- Scattered Arrangement: Distribute candles of varying heights across a larger surface area for a more relaxed and informal feel.
Tea Light Centerpiece
A simple and elegant centerpiece using tea light candles and decorative elements.
- Materials: Tea light candles, glass votives, decorative sand or pebbles, small shells or beads.
- Process: Fill the votives with sand or pebbles. Place the tea lights on top. Add shells or beads for extra visual appeal.
Pillar Candle Centerpiece
A more substantial centerpiece featuring pillar candles and a decorative base.
- Materials: Pillar candles (various heights), decorative stones or beads, a shallow bowl or tray.
- Process: Arrange the stones or beads in the bowl or tray. Place the pillar candles on top, varying their heights for visual impact.
Illustrative Descriptions of DIY Centerpieces
Let’s paint a picture of some unique and creative centerpiece ideas, focusing on their visual impact and the materials used.
Balloon Bonanza
Imagine a centerpiece featuring a cluster of balloons in vibrant shades of turquoise, coral, and sunshine yellow. They’re arranged in a cascading effect, some balloons slightly deflated for a playful, whimsical feel. The colors create a bright, energetic atmosphere, contrasting beautifully with a simple white tablecloth.
Confetti Celebration
Picture a centerpiece overflowing with colorful paper streamers and confetti. The streamers, in shades of fuchsia, emerald green, and sunny gold, are artfully draped and twisted, creating a sense of movement and energy. The confetti, a mix of tiny circles and stars in coordinating colors, adds a sparkly, festive touch, enhancing the overall texture and visual appeal.
Edible Extravaganza
Envision a centerpiece bursting with color and sweetness. A variety of candies – gummy bears, chocolate coins, and colorful jelly beans – are artfully arranged in a clear glass bowl. Surrounding these are delicate sugar cookies, decorated with pastel icing and sprinkles, adding a touch of whimsy and sophistication. The overall effect is one of playful elegance and delightful indulgence.
Repurposed Radiance
Imagine a centerpiece showcasing the unique charm of repurposed materials. Several vintage jars and bottles, each with a different shape and size, are arranged in a cluster. Some are painted with pastel hues, while others retain their original glass, showcasing their unique character. The jars are filled with wildflowers or artificial flowers, adding a touch of color and elegance.
The overall effect is a rustic-chic centerpiece that celebrates both beauty and sustainability.
So there you have it – a smorgasbord of DIY centerpiece ideas to transform your next birthday bash from “blah” to “bravo!” Remember, the most important ingredient isn’t just the materials, but the love and creativity you pour into each creation. So gather your supplies, unleash your inner artist, and get ready to wow your guests with centerpieces that are as unique and unforgettable as the birthday celebration itself.
Happy crafting!
General Inquiries
What if I’m completely clueless about crafting?
Don’t worry! This guide is designed for all skill levels. We’ll provide clear, easy-to-follow instructions for even the most crafting-challenged individuals. Think of it as crafting therapy – even if it’s a little messy, the results will be worth it!
How far in advance should I make my centerpieces?
That depends on the complexity of your chosen design. Simple centerpieces can be made a day or two before, while more elaborate ones might require a week or more of prep time. Plan ahead to avoid last-minute stress!
Can I use real candles with children present?
For safety reasons, consider battery-operated candles, especially if children will be attending. If you must use real candles, place them far out of reach and supervise closely.
What if I don’t have access to all the specific materials listed?
Get creative! The beauty of DIY is the ability to improvise. Substitute similar materials based on what you have available. A little resourcefulness can go a long way!