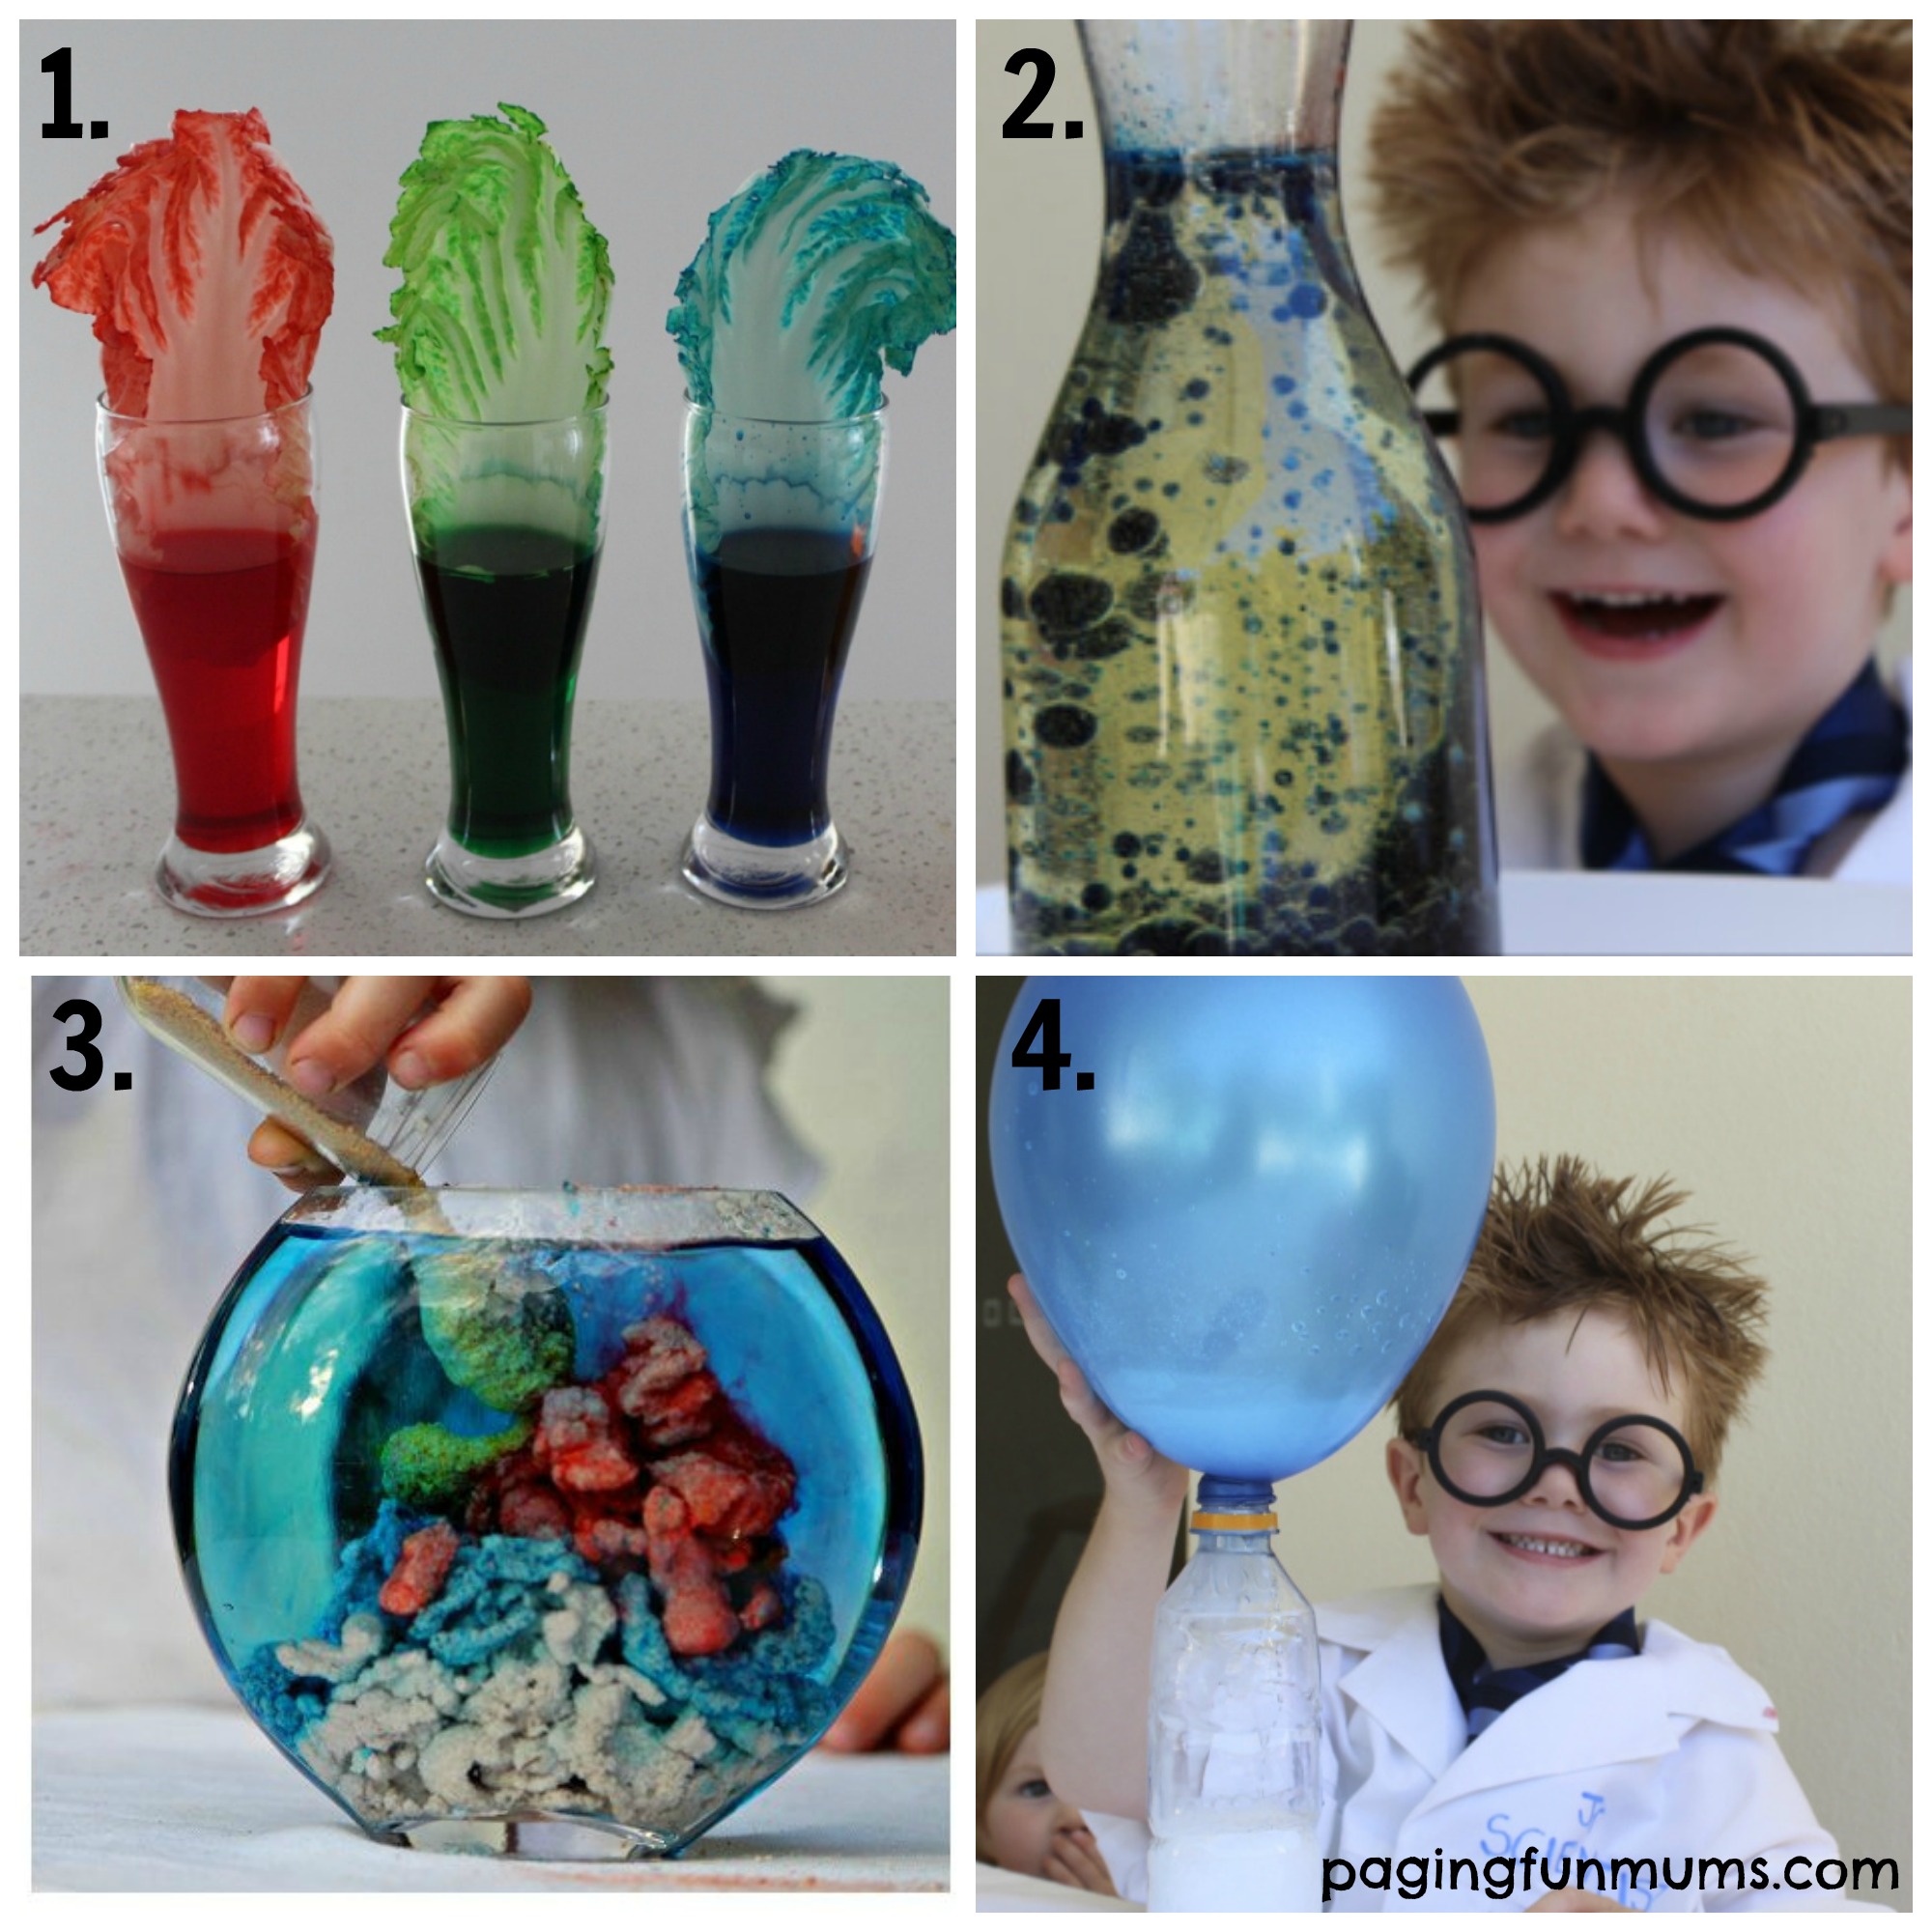
DIY Science Projects at Home: Forget boring textbooks and embrace the eruption of excitement! This isn’t your grandma’s science class – we’re talking bubbling volcanoes, homemade lava lamps that’ll make you feel like a mad scientist (in the best possible way), and experiments so cool, they’ll make your brain cells do the cha-cha. Get ready to transform your kitchen into a laboratory of learning, where the only explosions are the fun kind (we promise!).
We’ll guide you through age-appropriate projects, from preschool slime to high school physics, ensuring safety is always top priority. Prepare for a scientific adventure that’s both educational and outrageously entertaining!
We’ll cover everything from simple experiments using everyday household items to more complex projects that’ll challenge even the most seasoned young scientists. We’ll explain the science behind each experiment in a way that’s easy to understand, regardless of your background. So grab your goggles (safety first!), gather your materials, and get ready to unleash your inner scientist! Let the scientific shenanigans begin!
DIY Science Projects at Home: Unleash Your Inner Scientist!
Ever dreamt of transforming your living room into a bubbling cauldron of scientific discovery? Forget expensive science kits – the world of at-home science experiments is a treasure trove of fun, learning, and surprisingly simple projects. From creating mini volcanoes to building your own lava lamp, the possibilities are as limitless as your imagination. This guide will arm you with the knowledge and inspiration to embark on a thrilling scientific adventure, all within the comfort (and safety!) of your own home.
Get ready to ignite your curiosity and amaze your family and friends with your newfound scientific prowess!
Safety Guidelines for Home Science Experiments
Before we dive into the exciting experiments, safety first! Always supervise children during experiments, especially younger ones. Ensure proper ventilation when dealing with chemicals. Wear safety goggles to protect your eyes from splashes or fumes. Always read instructions carefully before starting any experiment. Designate a specific workspace for your experiments, away from food preparation areas.
And finally, if you’re ever unsure about anything, don’t hesitate to seek adult supervision or consult a reliable science resource.
Easy Science Experiments for Young Children (Ages 5-8)

These experiments are designed to be simple, engaging, and safe for young children. They utilize common household items and focus on basic scientific principles, making them perfect for sparking a love for science from a young age. Remember to adapt the complexity based on the child’s specific age and abilities.
| Experiment Name | Materials Needed | Procedure | Expected Outcome |
|---|---|---|---|
| Rainbow Density Tower | Various liquids (honey, corn syrup, dish soap, water, vegetable oil, alcohol), tall clear glass, food coloring | Carefully pour each liquid into the glass, starting with the densest (honey) and ending with the least dense (alcohol). Add a drop of food coloring to each liquid for visual appeal. | A colorful layered tower demonstrating the concept of density. |
| Walking Water | Several clear glasses, paper towels, water, food coloring | Arrange glasses in a row. Fill every other glass with water and add different food coloring to each. Fold paper towels in half and then in thirds to create strips. Place one end of each strip in a colored water glass and the other end in an empty glass. Observe over time. | The water will “walk” up the paper towels and mix colors in the empty glasses, demonstrating capillary action. |
| Floating Egg | Two glasses, water, salt, eggs | Fill one glass with plain water and the other with water mixed with a significant amount of salt. Carefully place an egg in each glass. | The egg will sink in plain water but float in salty water, illustrating the concept of density and buoyancy. |
The scientific principles behind these experiments are easily explained to young children. For example, the Rainbow Density Tower demonstrates that different liquids have different densities, causing them to layer based on their weight. Walking Water showcases capillary action, where water moves upwards against gravity through porous materials. The Floating Egg experiment highlights how the density of a liquid can affect buoyancy.
Intermediate Science Projects for Older Children (Ages 9-12)
These experiments introduce more complex concepts and require slightly more advanced problem-solving skills. They are designed to challenge older children and foster a deeper understanding of scientific principles.
- Experiment 1: Crystal Growing
- Materials: Borax, water, pipe cleaners, jar, food coloring (optional).
- Procedure: Dissolve borax in hot water. Shape pipe cleaners into interesting forms. Submerge the pipe cleaners in the solution. Let it sit undisturbed for several days.
- Results: Crystals will grow on the pipe cleaners, demonstrating the process of crystallization.
- Experiment 2: Homemade Lava Lamp
- Materials: Vegetable oil, water, food coloring, Alka-Seltzer tablets, tall clear container.
- Procedure: Fill the container mostly with oil. Add water and food coloring. Drop in an Alka-Seltzer tablet. Observe.
- Results: The tablet will create bubbles that rise and fall, mimicking a lava lamp, demonstrating density and convection.
- Experiment 3: Building a Simple Circuit
- Materials: Battery, wires, light bulb, bulb holder.
- Procedure: Connect the wires to the battery and light bulb. Observe.
- Results: The light bulb will light up, demonstrating the flow of electricity in a simple circuit.
The difficulty increase from the younger children’s experiments is evident in the need for more precise measurements, longer waiting times (crystal growing), and understanding of more abstract concepts like electricity.
Advanced Science Projects for Teenagers (Ages 13-18)
These projects delve into more advanced scientific concepts and may require specialized materials or equipment. Always prioritize safety and adult supervision when undertaking these experiments.
- Experiment 1: Building a Simple Spectroscope
- Materials: Cardboard box, razor blade, diffraction grating (available online), tape.
- Procedure: Carefully cut a slit in the box. Attach the diffraction grating. Point the slit towards a light source. Observe.
- Results: Observe the spectrum of light, demonstrating the principles of light diffraction and spectroscopy.
Safety Note: Exercise extreme caution when using a razor blade. Adult supervision is required.
- Experiment 2: Extracting DNA from Fruit
- Materials: Fruit (banana, strawberry), dish soap, salt, rubbing alcohol, blender, strainer, test tube.
- Procedure: Blend fruit with dish soap and salt. Strain the mixture. Add rubbing alcohol. Observe.
- Results: DNA will precipitate out of the solution, visible as a stringy, white substance.
Safety Note: Handle rubbing alcohol with care. Keep away from open flames.
- Experiment 3: Constructing a Simple Rocket
- Materials: Cardboard tube, plastic bottle, fins, tape, baking soda, vinegar.
- Procedure: Construct the rocket. Mix baking soda and vinegar. Launch the rocket.
- Results: The rocket will launch due to the pressure created by the reaction of baking soda and vinegar. Demonstrates Newton’s Third Law of Motion.
Safety Note: Launch the rocket in a safe, open area away from buildings and people. Wear safety glasses.
These experiments require a deeper understanding of scientific principles and more sophisticated experimental design. The challenges include precise measurements, careful handling of materials, and a greater understanding of the underlying scientific concepts.
Resources and Further Exploration
The world of DIY science is vast and exciting! Here are some resources to further your scientific journey:
- Science Buddies: www.sciencebuddies.org
- National Geographic Kids: kids.nationalgeographic.com
- Steve Spangler Science: www.stevespanglerscience.com
- The Usborne Complete Book of Science Experiments
Keeping a science journal is a fantastic way to document your experiments. Record your observations, results, and any challenges you encountered. This helps build critical thinking and analytical skills.
Get the entire information you require about diy ideas for trampoline frame on this page.
Many of these experiments can be extended. For example, in the crystal growing experiment, try different solutions or shapes. In the rocket experiment, experiment with different propellants or rocket designs. The possibilities are endless!
Illustrative Examples of Experiments, Diy science projects at home

Let’s delve into some detailed examples, providing vivid descriptions to help you visualize the process and results.
Baking Soda and Vinegar Volcano: Imagine a miniature Mount Vesuvius erupting in your kitchen! This classic experiment involves combining baking soda and vinegar in a container shaped like a volcano (e.g., a plastic bottle with clay around it). The vinegar’s acetic acid reacts with the baking soda’s sodium bicarbonate, producing carbon dioxide gas. This gas creates pressure, causing a foamy eruption that resembles a volcanic eruption.
The fizzing and bubbling are a visual spectacle of a chemical reaction in action. You can add red food coloring to mimic lava for an extra dramatic effect.
Homemade Lava Lamp: Picture a mesmerizing, shimmering light show in a glass jar. This experiment uses the principles of density and convection. Fill a tall, clear jar mostly with vegetable oil. Add water colored with food coloring. Drop in an Alka-Seltzer tablet.
The tablet reacts with the water, creating carbon dioxide bubbles that attach to the colored water droplets. These buoyant bubbles rise to the top, creating a mesmerizing “lava” effect. As the bubbles pop at the surface, the colored water sinks back down, creating a continuous cycle.
Water Properties Experiment: Observe the amazing properties of water! A simple experiment showcasing surface tension involves carefully placing a small paper clip onto the surface of a glass of water. The surface tension of the water, caused by the cohesive forces between water molecules, allows the paper clip to float, even though it is denser than water. Capillary action can be demonstrated by placing a celery stalk in a glass of colored water.
The water will travel up the stalk, illustrating how water moves against gravity through narrow tubes.
So, there you have it – a whirlwind tour of DIY science projects that’ll ignite a passion for learning in young minds (and maybe even rekindle your own!). Remember, science isn’t just about memorizing facts; it’s about exploring, experimenting, and having a blast along the way. From fizzy reactions to mesmerizing optical illusions, the world of science is a playground of wonder just waiting to be explored.
So ditch the screen time, grab your lab coat (or a bathrobe – we won’t judge!), and embark on this exciting journey of discovery. Happy experimenting!
Answers to Common Questions: Diy Science Projects At Home
What if an experiment doesn’t work as expected?
Don’t worry! Science is all about trial and error. Analyze what might have gone wrong, research the theory further, and try again. Even “failed” experiments teach valuable lessons.
How can I make these experiments safer?
Always supervise children closely, especially younger ones. Use age-appropriate materials and follow the safety guidelines provided for each experiment. Consider using safety goggles and gloves where appropriate.
Where can I find more advanced DIY science projects?
Many websites and books cater to more advanced scientific pursuits. Search online for “high school science projects” or “advanced science experiments” for a wealth of ideas.
Are these experiments expensive?
Most of the experiments use readily available household items, making them very affordable. You’ll be surprised at how much science you can do with everyday materials!


