DIY Wall Art Painting Ideas: Forget beige walls and embrace your inner Picasso! This isn’t your grandma’s paint-by-numbers; we’re talking about transforming your living space into a vibrant, personal art gallery, one splatter, stroke, and stencil at a time. Whether you’re a seasoned artist or someone who can barely draw a stick figure (don’t worry, we’ve got you covered!), this guide will unlock your creative potential and help you craft stunning wall art that reflects your unique style.
Prepare for a splash of fun and a whole lot of artistic self-discovery!
From gathering the essential supplies (think paint that’s practically begging to be unleashed, brushes that practically dance on the canvas, and maybe even some strategically placed painter’s tape for those perfectly straight lines) to mastering simple techniques and diving into more advanced styles, we’ll take you on a step-by-step journey. We’ll explore everything from minimalist masterpieces to abstract explosions of color, and even show you how to transform everyday objects into unexpected works of art.
Get ready to unleash your inner artist!
DIY Wall Art Painting: Unleash Your Inner Artist: Diy Wall Art Painting Ideas
Tired of staring at blank walls? Yearning for a splash of personality in your home? DIY wall art painting is your answer! It’s a fantastic way to express your creativity, personalize your space, and add a unique touch that reflects your style. Forget generic prints – let’s dive into the wonderfully messy world of creating your own masterpieces!
The appeal lies in the sheer personalization. You’re not just decorating; you’re crafting a piece of yourself, a visual narrative of your tastes and passions. DIY projects offer a cost-effective alternative to buying pre-made art, allowing you to create stunning pieces without breaking the bank. Plus, the satisfaction of transforming a blank canvas into a vibrant work of art is unparalleled.
Check crafts to make and sell from home to inspect complete evaluations and testimonials from users.
Introduction to DIY Wall Art Painting Styles
The world of DIY wall art is incredibly diverse. From bold abstract expressionism to serene minimalist designs, the possibilities are endless. We’ll explore techniques ranging from simple geometric patterns to intricate mixed-media creations, ensuring there’s something for every skill level and aesthetic preference. Think vibrant acrylics, soothing watercolors, the textured charm of impasto, or the clean lines of minimalist designs – the choice is yours!
Gathering Materials and Preparation
Before you unleash your inner Picasso, gather your supplies! The specific materials will depend on your chosen technique, but here’s a starting point for a well-stocked artist’s arsenal.
- Acrylic paints: Versatile, quick-drying, and available in a vast array of colors.
- Watercolor paints: Perfect for delicate washes and landscapes, offering a translucent and ethereal quality.
- Canvases: Choose the size and type that suits your project (stretched canvas, canvas boards, etc.).
- Brushes: A variety of sizes and shapes for different techniques and effects.
- Painter’s tape: Essential for creating clean lines and geometric patterns.
- Stencils: For adding intricate designs or repeating motifs.
- Palette knife: For impasto techniques and textural effects.
- Primer: Prepares your surface for optimal paint adhesion.
Preparing your surface is crucial for a professional finish. Clean your canvas thoroughly, removing any dust or debris. Apply a primer coat to ensure even paint application and prevent the canvas from absorbing the paint unevenly.
| Paint Type | Suitable Surfaces | Pros | Cons |
|---|---|---|---|
| Acrylic | Canvas, wood, paper | Versatile, quick-drying, vibrant colors | Can be slightly less detailed than watercolors |
| Watercolor | Watercolor paper, canvas (prepared) | Delicate washes, translucent effects | Requires more patience and control |
| Oil | Canvas, wood panels | Rich colors, slow drying time (allows blending) | Longer drying time, requires solvents |
| Tempera | Wood, canvas, paper | Durable, matte finish | Less vibrant than acrylics |
Easy Painting Techniques for Beginners, Diy wall art painting ideas
Don’t be intimidated! Even absolute beginners can create stunning wall art. Let’s start with some simple yet effective techniques.
- Geometric Patterns with Painter’s Tape: Apply painter’s tape to your canvas to create geometric shapes (stripes, squares, triangles). Paint within the taped areas, then carefully remove the tape once the paint is dry to reveal crisp lines. Experiment with color combinations for a dynamic effect!
- Stenciling: Choose a stencil with a design you love. Secure it firmly to your canvas and apply paint using a sponge or brush. Lift the stencil carefully to reveal a perfectly replicated design. Layer different stencils or colors for a more complex look.
- Simple Color Blocking: Divide your canvas into sections and paint each section a different color. This technique creates a bold and modern aesthetic. You can use painter’s tape for clean lines or embrace a more free-flowing, slightly imperfect style.
Advanced Techniques and Styles
Once you’ve mastered the basics, it’s time to explore more advanced techniques and styles.
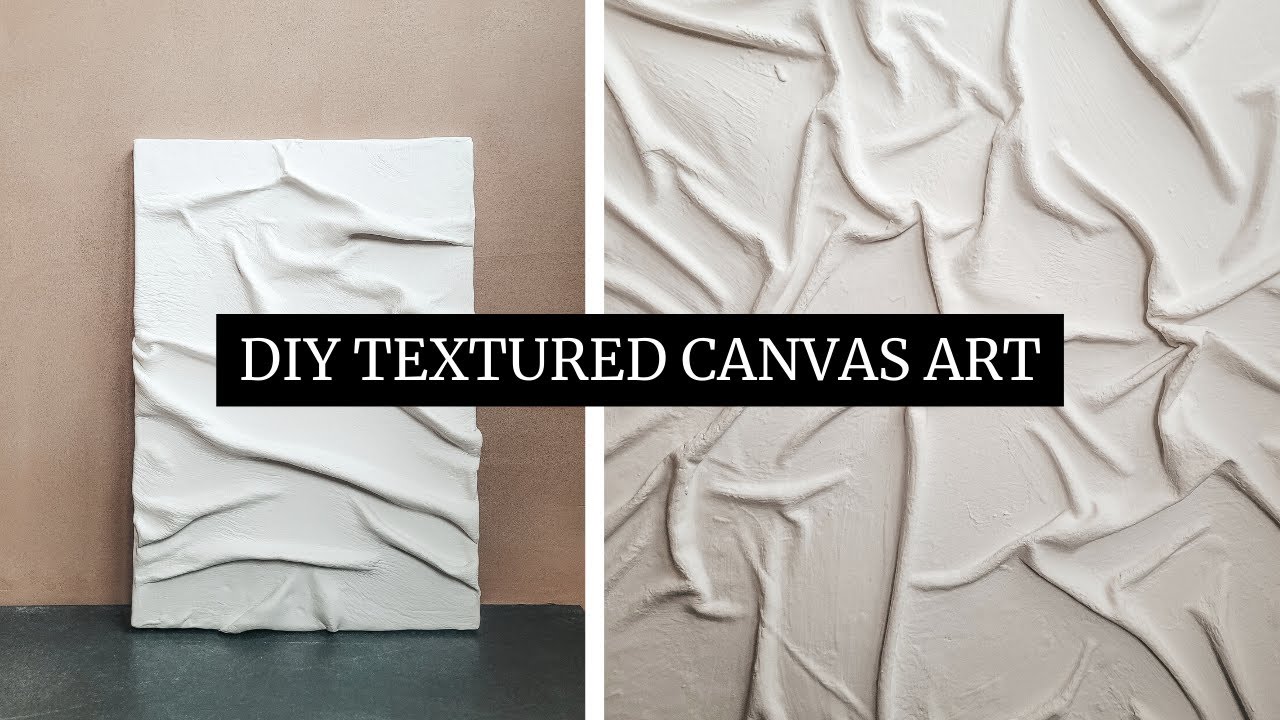
Impasto involves applying thick layers of paint to create texture and depth. Experiment with adding sand, fabric scraps, or other materials to your paint for unique textural effects. Abstract art offers boundless freedom, allowing you to express yourself through color and form without the constraints of realism. Minimalist designs focus on simplicity and clean lines, often using a limited color palette.
Realistic painting requires patience and skill but can yield incredibly lifelike results.
Mixed media opens a world of possibilities. Combine paint with fabric, paper, photographs, or found objects to create truly unique pieces. Think about layering textures and colors to create depth and visual interest.
Creating Specific Types of Wall Art
Let’s delve into creating three distinct types of wall art.
- Watercolor Landscape: Sketch a simple landscape scene lightly on your watercolor paper. Apply washes of color, layering lighter shades over darker ones to create depth and dimension. Use a fine brush for details like trees and clouds.
- Bold Abstract Piece: Choose two contrasting colors. Apply them freely to your canvas, allowing the colors to blend and interact. Use a palette knife or brush to create texture and movement. The key is to embrace spontaneity and let your intuition guide you.
- Personalized Family Portrait: Use simple shapes (circles, squares, triangles) to represent each family member. Assign each person a unique color. Arrange the shapes on your canvas to create a playful and personalized portrait. You can add simple details like hair or clothing using smaller shapes or lines.
Displaying and Preserving Your Artwork
Once your masterpiece is complete, it’s time to show it off! Framing adds a professional touch and protects your artwork from damage. Consider using different types of frames to complement your artwork’s style. Hanging techniques depend on the size and weight of your piece. For heavier pieces, use sturdy hanging hardware.
To protect your artwork, seal it with a varnish or sealant designed for the type of paint you used. This will prevent fading and damage from dust and moisture. Regular dusting will keep your artwork looking its best. Avoid placing your artwork in direct sunlight, as this can cause fading.
- Clean gently with a soft cloth.
- Avoid harsh chemicals or abrasive cleaners.
- Keep away from direct sunlight and moisture.
Inspiring Examples and Ideas
Let’s explore some unique and visually appealing DIY wall art projects.
- Repurposed Materials: Transform old window frames into miniature canvases, painting scenes within the glass panes. This creates a unique, vintage-inspired piece with a charming, rustic feel. The contrast between the aged wood and the vibrant painted scenes adds visual depth and character. The irregular shapes of the window frames add a touch of whimsy and unexpected elegance.
- Geometric Abstract: A canvas featuring a bold interplay of geometric shapes, using a limited color palette of deep blues and warm oranges. The sharp lines and contrasting colors create a visually striking piece that is both modern and sophisticated. The use of painter’s tape ensures crisp, clean lines, while the interplay of shapes generates visual rhythm and balance.
- Textured Landscape: A landscape painting utilizing impasto techniques to create a three-dimensional effect. The thick application of paint creates a tactile quality, enhancing the sense of depth and texture in the scene. The combination of smooth and rough brushstrokes adds visual interest and movement, making the landscape appear more dynamic and alive.
Visual styles could include:
- Abstract Expressionism: Characterized by spontaneous brushstrokes, bold colors, and emotional expression. Techniques include dripping, splattering, and layering colors.
- Minimalism: Emphasizes simplicity and clean lines, often using a limited color palette and geometric shapes. Techniques involve precise application of paint and careful planning of composition.
- Pop Art: Inspired by popular culture, often featuring bright colors, bold imagery, and a sense of playfulness. Techniques may involve stenciling, collage, and the use of found objects.
So, there you have it – a whirlwind tour of DIY wall art painting ideas! From beginner-friendly techniques to more advanced explorations, you now possess the knowledge and inspiration to turn blank walls into breathtaking personal statements. Remember, the most important ingredient is your own unique creativity and a willingness to embrace the mess (it’s all part of the fun!).
Don’t be afraid to experiment, to make mistakes (they often lead to happy accidents!), and most importantly, to enjoy the process. Now go forth and create something amazing!
Top FAQs
What kind of paint is best for beginners?
Acrylic paints are a fantastic choice for beginners due to their ease of use, quick drying time, and water-based cleanup.
How do I clean my brushes after painting?
Clean your brushes immediately after use with warm soapy water. For acrylics, a quick rinse is usually sufficient. For oil paints, you’ll need a solvent like turpentine.
Can I paint directly on the wall without priming?
While you
-can*, priming is highly recommended for a smoother finish and better paint adhesion. It also prevents the wall’s texture from showing through.
How do I prevent my artwork from fading?
Use a UV-resistant sealant to protect your artwork from sun damage and fading. Keep it out of direct sunlight whenever possible.